Visualizzazione post con etichetta DIY. Mostra tutti i post

venerdì 25 luglio 2014

3D Webfier on Fa)(a demo


First 3d print test on wireless mode.
Gcode file wireless trasferred from Pronterface to the Falla 3d Printer.
Used 3D Webfier acting as USBtoWifi bridge

3DWebFier Project - the spreading of 3D printers is giving hint to the creativity of many people, including myself, it's great to draw an object and then send it to to the printer, you will be fascinated to see how a thin wire, like raw material, fluid materialize your idea.

Project accepted to MFR14 (Maker Faire Rome 2014)


more on 3dwebfier

mercoledì 4 giugno 2014

3DWebfier - WIFI to USB 3D printer remote control

3DWebFier Project - the spreading of 3D printers is giving hint to the creativity of many people, including myself, it's great to draw an object and then send it to to the printer, you will be fascinated to see how a thin wire, like raw material, fluid materialize your idea. But we realize that time is passing, for a complex object sometimes also needed from 6 to 10 hours before it is completed.

Thus we have a new requirement: it would be great if our 3D Printer can be remotely controlled from the office or from our car, check the progress of work and even stop in case of emergency. Ok, I know that someone has already thought this, you may decide to use the old laptop connected to the router of your home or office, or definitely the most easy, take a Raspberry PI as a front-end Internet for your printer 3D. Our idea is to use our development board PIC-AP BOARD (or any board with similar characteristics, a Microchip PiC24 such this one ) connected via USB to the printer 3D and WiFi to home router via a WiFi module with serial interface HLK-RM04 We use the sw free VSPM Virtual Serial Com on the laptop to map the ip address of the printer to a virtual com of our PC and we will control our printer with Pronterface, from another room, the office or from another city.

 Read more: 3DWebfier - WIFI to USB 3D printer remote control

sabato 23 novembre 2013

Un Mercoledi da Maker


Tratto da : http://openmag.it/2013/11/21/popupmakers-si-presenta-al-roma-makers-fablab/

Si è svolto il 20 novembre il primo appuntamento con i PopUpMakers presso il Roma Makers Fablab.

Il PopUpMakers è un vero Mercoledi da Makers, in cui gli artigiani del futuro possono presentare i loro progetti.

PopUpMakers è un evento mensile per accelerare connessioni e collaborazioni locali nel movimento dei Makers. I protagonisti raccontano un loro progetto attraverso parole e immagini ma soprattutto un prototipo da mostrare. 15 minuti per condividere l’idea, il processo di creazione, gli intoppi e le scoperte del work-in-progress.
L’evento, che è stato presentato da Alessio Nisi, noto giornalista di CheFuturo! e Startup Italia, ha visto come protagonisti Gian Luigi Perrella e Agostino Mosillo che hanno presentato Remote Shooter BT per controllare da uno smartphone o un pc (via Bluetooth) una macchina fotografica digitale, dallo scatto a funzioni di Time Lapse, velocità e apertura diaframmi o scatto scatenato da eventi esterni. Un secondo progetto presentato  Spazio è stato dato anche all’azienda Blu Sistemi che ha presentato Smartize.it! , ovvero un sistema di domotica open source modulare e a basso costo, per risolvere in modo smart i piccoli e grandi problemi di automazione della vita quotidiana.
Il Roma Makers Fablab è la prima realtà romana dedicata agli artigiani digitali, le iniziative sono volte a promuovere la conoscenza e cultura dei makers, ma soprattutto fornire risposte reali e concrete nei confronti del territorio. Come ha sottolineato Stefano Varano, uno dei responsabili del centro, le attività vengono organizzate anche secondo le esigenze degli utenti, come ad esempio l’opportunità che si sta offrendo a un gruppo di giovani ragazze le quali potranno usufruire di alcuni macchine da cucine, per potersi dedicare alle loro attività laboratoriali.

https://www.youtube.com/watch?v=DjlDg1_eGoM

lunedì 18 novembre 2013

POPUP MAKERS 20 Novembre


Popup Makers del 20 novembre

Popup Makers

“Think with your hands, build something or try something,then talk about it, NOT the reverse.”
Perry Kleban

“Crea più valore di quello che puoi utilizzare”
Tim O’Reilly


20 novembre 2013 dalle 20 alle 22
@Roma Makers Fablab
(zona Metro Garbatella, Italo)

PRESENTAZIONI

Per la seconda volta si svolge al Roma Makers Fablab, all’interno del Mercoledi da Makers, istituito come appuntamento settimanale dei makers romani per portare avanti i propri progetti.

Gian Luigi Perrella e Agostino Mosillo presentano Remote Shooter BT
Controllare da uno smartphone o un PC (via Bluetooth) una macchina fotografica digitale, dallo scatto a funzioni di Time Lapse, velocità e apertura diaframmi o scatto scatenato da eventi esterni.

Blu Sistemi presenta Smartize.it!
Domotica open source modulare e a basso costo, per risolvere in modo smart i piccoli e grandi problemi di automazione della vita quotidiana.

L’evento sarà presentato da Alessio Nisi, blogger e giornalista per Startup Italia e CheFuturo.


venerdì 8 novembre 2013

The Gianluigi Perrella's World.

The Gianluigi Perrella's World.
Gian Luigi Perrella aka Menteblu61 on Flickr community, is a middle age man, employed for years in telecommunication companies, he worked in the past in electronic laboratories. Since he was a child, he was passionate of electronics, robotics projects and photography. 


“When you're curious, you find lots of interesting things to do.” ~Walt Disney

The GLP World


                                http://www.glperrella.it/http://www.glperrella.it/

Inside the site you can find topics regarding Photography, Hi Tech, Electronics Projects, Amenities.
Bookmark this QRcode: http://www.glperrella.it/
                                                        QR Code

lunedì 20 maggio 2013

Squeezzy Mouse

Squeezzy, the squeezable mouse coming soon.
The new generation wireless, antistress mouse
Imagine if an antistress ball bounces on the wall or on your hand, and after become a full working, open air mouse.
Stay tuned on

 http://igg.me/at/squeezzy/x/2778971
 http://www.pic-ap-board.blogspot.com

What is Squeezzy Mouse?

It's a wireless mouse inside a stress ball.


Presentation

Why Squeezzy Mouse?

                                                        No more usual computer mice!

Inside Squeezzy
Squeezzy
The Squeezzy Rechargeable Bluetooth laptop open air Mouse is designed to work with Bluetooth enabled PC (for Mac computers in the future too) and no receiver is required.
With advanced Bluetooth technology, this mouse works up to 33 ft away.
The high performance accelerometer sensor has the ability to detect every movement During gaming or other activities.
Never worry about dead batteries again, this mouse charges while in use.
 A perfect option for travelers and for relaxing moments, the Bluetooth Mouse is lightweight.
Eliminates the need for a separate receiver, works seamlessly up to
33ft away with a Bluetooth enabled PC

martedì 9 aprile 2013

Video Wall with Raspberry PI


“What’s innovative about a video wall?” I hear you cry. “We’ve all seen them. Big…walls of video. Been done for years.”
We’ve said many times that the single most innovative thing about the Raspberry Pi is its price. $25 or $35 gets you something that would have cost you four or five times that amount before the Pi arrived on the market. This means that you can save large sums of money in some applications, especially in applications where you need to buy a lot of separate devices. A video wall requires one device per screen, and another to drive them all together. I’ve seen video wall solutions being run with all kinds of devices at the back end; previously one of the cheapest ways to do this was to buy a Playstation for each of your screens – obviously a much more expensive (and power-hungry – you’re spinning a lot of hard drives all day to get the result you want) way to get what you’re after.
Plus, of course, our HD video capability’s really great.
So Alex Goodyear at Culham Centre for Fusion Energy has put together a really elegant video wall, supported by a group of Raspberry Pis. Energy consumption and cost are both reduced enormously, making video walls like this much more accessible to enterprises which don’t have huge funds, like museums, schools, shops, galleries and offices.


You can use different sizes and orientations of screen in the same set-up here; you can use the screens to show one large moving image or many small ones; you can display static content like photos or web pages alongside moving content on the same wall.


Read more about what Alex has come up with at CCFE – we’re looking forward to seeing more of these in the wild!

Source: http://www.raspberrypi.org/archives/3648

giovedì 24 maggio 2012

BT Remote Shooter 1.0: Bluetooth Control cameras for Android


After the completion of Remote Shooter 1.0, the solution for remote control shooting of digital cameras with features Time Lapse and events, we transfer the GUI and its functions on devices using the Android App Inventor.

NEW:
 tested on:
Nikon Coolpix AW100
Nikon D50
Canon Powershot A300
Canon Poweshot S500

The idea stems from the desire to experiment with on Android App Inventor and the practical need to expand the graphic interface of the Remote Shooter 1.0 to make it both easier and faster entry of parameters for Time Lapse or prospective role in the study.
If it is necessary to insert large intervals of time or number of shots, we realized that it could be difficult and perhaps even tedious, use only the up / down on the board.
For those unfamiliar with the project Remote Shooter 1.0, is essentially a sophisticated remote control for remote shooting (but not only) digital camera via USB, in fact, many models of compact and DSLR cameras, Nikon and Canon, for example, are compatible PTP mode with the USB PIC-AP-BOARD (PIC Auto Programming Board) and the firmware RemShoot 1.0 (Remote Shooter).
The ability to remotely activate many functions (first click) on digital cameras, makes it possible to take pictures sometimes impossible or at least difficult to achieve with the traditional method because of human reaction times.
The PTP and applications in photography.
Most digital cameras to provide medium-high level command set PTP for their remote control, or simply to transfer images to a PC.
Using the appropriate commands and properties the photo enthusiast can:
1) remotely the shutter button (shutter),
2) Make an Interval (Time Lapse)
3) Take pictures automatically based on events detected by sensors of light and sound.
Making jerky in the world of high speed photography '(a falling drop of water or other liquid, explosion of balloons etc) or take shots at regular intervals (even hours) while Time Lapse (eg to record the blossoming of a flower or the hatching of an egg) and 'easily achieved by combining this system with appropriate sensors, motion, light or sound.
To check if your camera can be controlled by RemShoot RemShoot BT 1.0 or 1.0 you should run the test compatibility with your application for windows (XP and Seven):
http://goo.gl/2BVMg
Once you extract the download, run the executable and follow the instructions PTPControlCheck.exe.
Interesting feature is that RemShoot BT 1.0 Firmware is upgradeable via a USB stick.

If you are interested in Remote Shooter assembled and tested, with LCD display, you can find it on Ebay Italy (BT Module not included)


examples:

My Portfolio on flickr.com

Read more

lunedì 21 maggio 2012

Remote Shooter BT 1.0: Controllo Bluetooth di macchine fotografiche per Android

main foto2
Dopo la realizzazione di Remote Shooter 1.0, la soluzione per il controllo remoto dello scatto di macchine fotografiche digitali con funzioni di Time Lapse e ad eventi, trasferiamo l'interfaccia grafica e le sue funzioni su dispositivi Android utilizzando App Inventor.

NEW:
Testato su:
Nikon Coolpix  AW100
Nikon D50
Canon Powershot A300
Canon Poweshot S500

L'idea nasce dalla curiosità di sperimentare su Android con App Inventor e dalla necessità pratica di espandere l'interfaccia grafica del Remote Shooter 1.0 per rendere al contempo più semplice e rapido l'inserimento dei parametri di Time Lapse o di future funzioni allo studio.
Nel caso infatti sia necessario inserire grandi intervalli di tempo o numero di scatti, ci siamo resi conto che poteva essere complicato e forse anche tedioso, usare solo i tasti up/down sulla board.
Per chi non conoscesse il progetto Remote Shooter 1.0, è sostanzialmente un sofisticato telecomando per lo scatto remoto (ma non solo) di macchine fotografiche digitali tramite la porta USB, molti modelli infatti di compatte e  DSLR, Nikon e Canon ad esempio, sono compatibili in PTP mode con la scheda USB PIC-AP-BOARD (PIC Auto Programming Board) ed il firmware RemShoot 1.0 (Remote Shooter).
La possibilità di attivare remotamente molte funzioni (prima di tutto lo scatto) sulle macchine fotografiche digitali, rende possibile realizzare fotografie a volte impossibili o almeno difficili da realizzare con il metodo tradizionale a causa dei tempi di reazione umani.
Il protocollo PTP e applicazioni nella fotografia.
Gran parte delle macchine fotografiche digitali di fascia medio alta mettono a disposizione un set di comandi PTP per il loro controllo remoto, o semplicemente per il trasferimento delle immagini su un pc.
Utilizzando gli opportuni comandi e proprietà l’appassionato di fotografia potrà:
1) Remotizzare il pulsante di scatto (shutter),
2) Realizzare un Intervallometro (Time Lapse)
3) Scattare foto automatiche sulla base di eventi rilevati da sensori di luce e suono.
Fare scatti nel mondo della fotografia ad alta velocita’ (caduta di una goccia d’acqua o altro liquido, esplosioni di palloncini etc) o fare scatti a intervalli regolari (anche di molte ore) con la funzione Time Lapse (ad esempio per registrare lo sbocciare di un fiore o lo schiudersi di un uovo) e’ facilmente realizzabile abbinando a questo sistema opportuni sensori di movimento, luce o suono.
Per verificare se la tua fotocamera può essere controllata da RemShoot 1.0 o RemShoot BT 1.0 si consiglia di eseguire il test di compatibilità con l’applicazione per windows (XP e Seven):
http://goo.gl/2BVMg
Una volta effettuato il download estraete il file, lanciate l’eseguibile PTPControlCheck.exe e seguite le istruzioni.
Interessante caratteristica di RemShoot BT 1.0 è che Il firmware è aggiornabile tramite una chiavetta USB.


Se ti interessa Remote Shooter montato e collaudato, completo di display, puoi trovarlo su Ebay Italia (escluso modulo bluetooth)

esempi:


Leggi tutto

giovedì 19 aprile 2012

Make4Cash: 1000 euro al progetto migliore!


Finalmente un grande e avvincente contest per appassionati di elettronica!

Trasforma la tua idea in denaro


Elettronica Open Source in collaborazione con la rivista Elettronica In presenta Make4Cash. Realizza la tua idea e presenta il tuo progetto. 1000 euro al progetto più votato! Chi lo vota? Voi!

Make4Cash: oltre Arduino!

Arduino è una rivoluzione elettronica, permette a tutti, anche a chi non ha mai acceso un led, di realizzare la propria idea, dar vita al proprio prototipo!
Se sei quindi un hobbista Arduino è probabilmente lo strumento più indicato per poter realizzare il tuo progetto. Ma non solo, possono partecipare anche i professionisti e con qualsiasi piattaforma. Potete utilizzare una qualsiasi demoboard oppure un circuito completamente sviluppato da voi.

Linee guida per il progetto

Il progetto dovrà essere presentato in un articolo tecnico che, se accettato, verrà pubblicato (ovviamente a vostro nome)
in prima pagina su Elettronica Open Source

e sulla rivista Elettronica In.

L'articolo dovrà essere originale e contenere i seguenti capitoli:
1) Una foto del progetto finito.
2) Descrizione (l'idea, come nasce il progetto e la sua descrizione generale)
3) Schema elettrico (oppure schema e blocchi, con spiegazione)
4) Layout (montaggio e realizzazione hardware su pcb, millefori, breadboard o demoboard)
5) Software (la pubblicazione del software è a discrezione dell'autore)
Quest'ultimo punto sarà necessario solo se il progetto avrà necessità di un software per funzionare. Ad esempio, se è presente un microcontrollore, sarà necessario descrivere il funzionamento del firmware oppure se la vostra scheda si interfaccia al PC che comanderà alcune funzioni, dovrete argomentare il software relativo. Se avete realizzato tutto a componenti discreti, potete saltare il punto 5 :)
Appena ci avrete comunicato la vostra partecipazione, vi saranno dati i permessi per scrivere direttamente online, su questo blog, l'articolo tecnico relativo alla presentazione del progetto. Entro 48h da quando ci avviserete che l'articolo è pronto, lo valuteremo e, se soddisferà i requisiti richiesti, verrà pubblicato in prima pagina. Successivamente, rispettando i tempi di stampa, sarà pubblicato sulla rivista Elettronica In.
Potranno essere accettati anche progetti già realizzati, l'importante è che la presentazione sia realizzata in esclusiva per l'iniziativa e che voi, ovviamente, siate l'autore del progetto!
E' possibile partecipare anche con più progetti!

Quale sarà il progetto che riceverà i 1000 euro?

Quello che la community sceglierà come migliore!


Io partecipo con il progetto "Chi Guida Stasera?"

http://it.emcelettronica.com/chi-guida-stasera-alcool-game-project

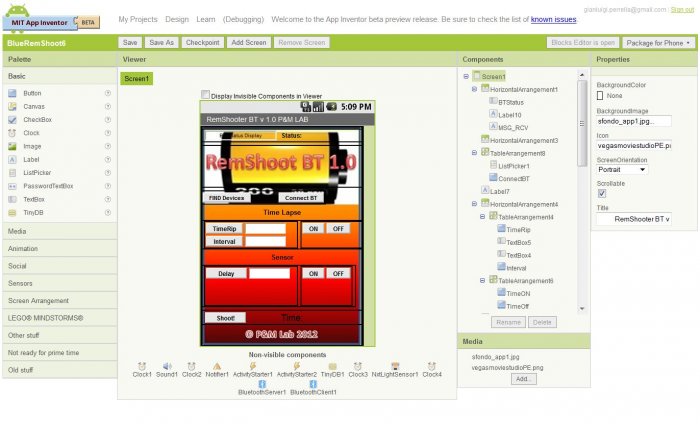
basato sulla scheda PIC-AP-BOARD 1.0


leggi tutto su EMC Elettronica Open Source